


Help & Tutorials - Site Builder Topics
Answers to questions about our Site Builder
- Site Builder FAQ's
- Getting Started (Start here)
- Website Layout & Design
- Site Navigation & Pages
- Adding & Editing Content
- Website Add-ons & Widgets
- Domain Name and Emails
- Search Engine Optimization
- Blog (Create & Manage Blogs)
- Website Traffic & Site Statistics
- Publish your website
- Serving Ads on your Site
- Contact Support
Getting Started
What should you do first?
Creating your website should be a fun and easy experience. Here are a few simple steps to get you started.
The first time you create your site you'll be guided through a few simple steps to Select your site type, and the default pages. This will serve as the shell of your website from which you can then customize to further meet your design and content needs.
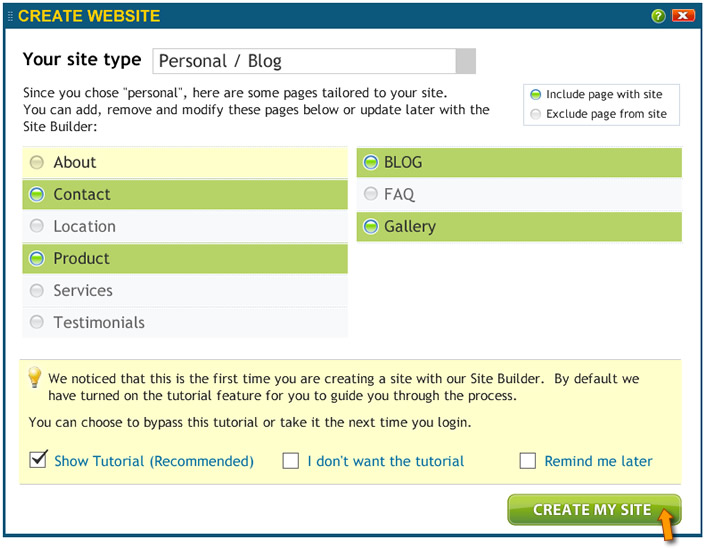 Note: We recommend you select "Show Tutorial" to reduce learning curve on the first few steps of site building process.
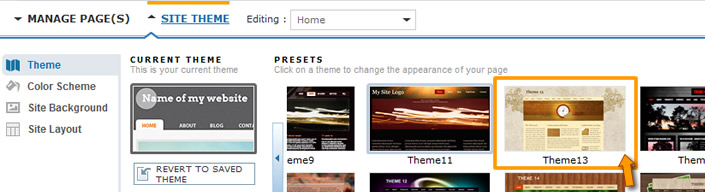
STEP 1: Select your theme
The theme is a reflection of your site's overall appearance. It serves as the skin of your website. Our Elastic themes are pre designed layouts that serve as a starting point for your website's design. For more information on site layout and using themes click here.
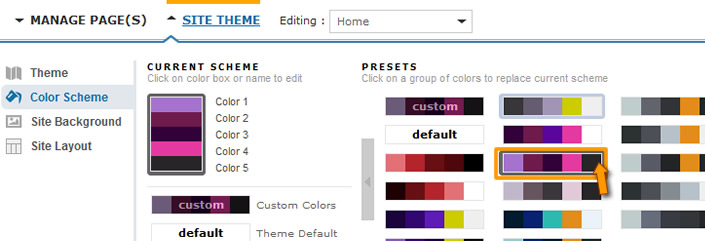
STEP 2: Select your color scheme
A site should be visually appealing and easy to read. You can select a desired color scheme and you can also fully customize your color scheme by selecting any color of your choice. For more information on color scheme and design click here.
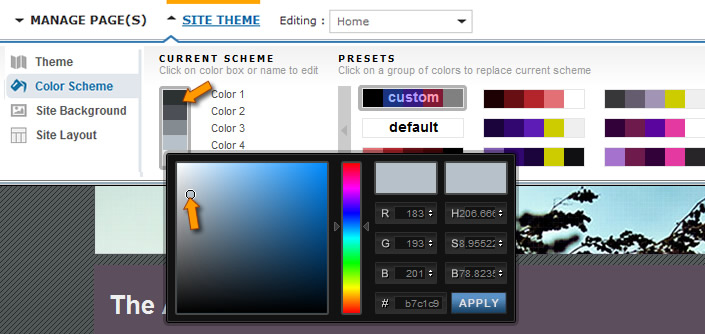
Then select a color and you can change to desired color (select from millions of colors)
STEP 3: Populate your Content
After you have finished with the visual aspects of your website, it is time to begin populating your website with real content. (You can revisit this step anytime as you gather more content and information for your website).
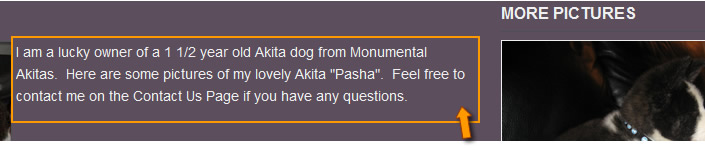
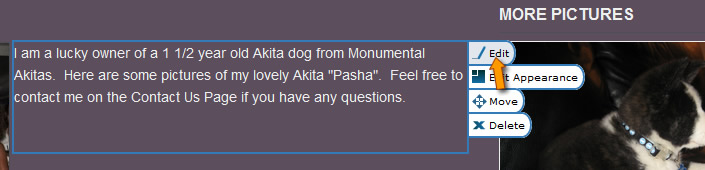
Your pages have already been populated with preset (placeholder content) which serve as a starting point for content population. You can double click or click on a container of content and select "Edit Content" to open the content editor and update your content.
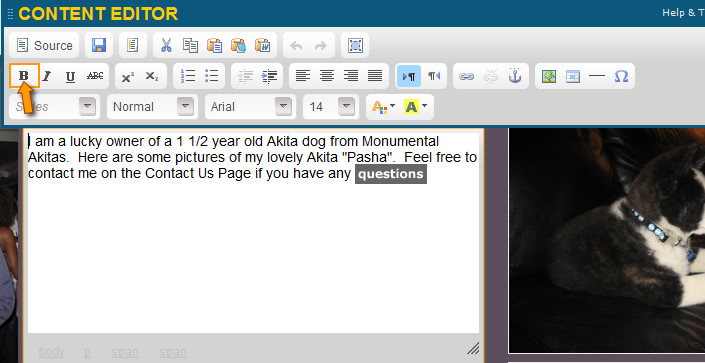
For more detailed information on working with content click here.
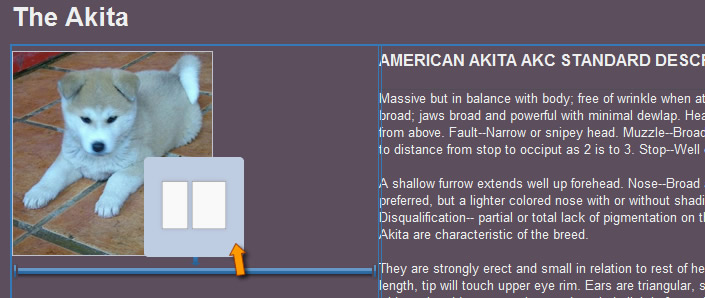
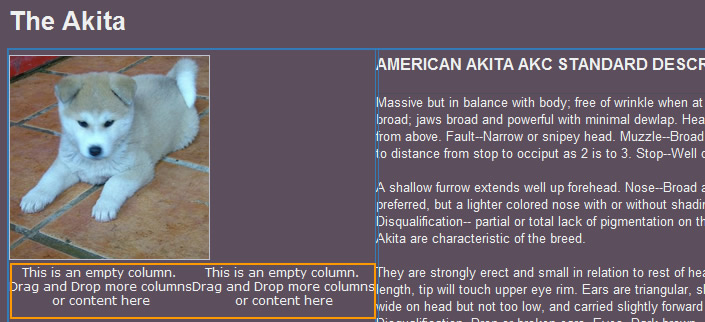
Use Containers to structure your content
When you want to go beyond the default structure of page layouts, use containers to create columns or rows that can serve as real estate to place content elements within.

Pick between 1-3 columns for the empty containers. These containers will assist you to visually layout each web page before adding your content. With these containers you can insert via drag and drop various assets including images, videos and more.
STEP 4: Preview & Publish
Preview Button
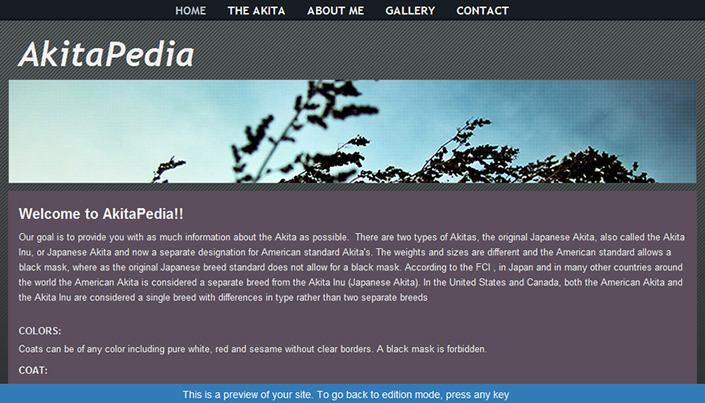
The preview button allows you to see the current changes on your website before it is published. It is recommended you always preview your page(s) before you publish them to ensure they appear to your liking within the browser. In the preview window, you will have a fully functional version of your website. You will notice a small banner on the bottom of your browser as a reminder that you are in preview mode.
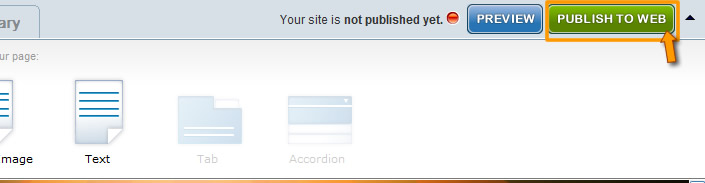
Publish Button
The publish button makes your website live for everyone to see. Be sure you have finalized your website/web page before you hit this button. You can publish your site anytime; You may come back to the Builder and update your content and publish as you complete each page or publish site in its entirety. The first time you Publish you want to publish your site not an individual page.
You can learn more about publishing your web site here.
Note: it will take longer to publish an entire site than publishing an individual page. Publish function depending on network latency and degree of content present on your site can take as little as few seconds or long as few minutes. A notification will notify you when publish has been completed.
Common topics on getting started and building your website:
- Explore the Site Builder Interface
- What should you do first?
- Manage Layout and Theme
- Adding new pages to your site
- Adding Page Elements and Widget
- Publish your website (Make it Live)